How To Clean Wooden Furniture
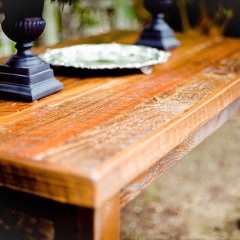
Wooden furniture has an unique appeal as a home accessory. Over the years hardwood acquires an even deeper, lush look that makes it an irresistibly beautiful home accessory and a valuable possession with the potential to become a very valuable heirloom for your children. However, the same way wood becomes more and more appealing with each year that passes, it also tends to gather dirt and grime. They can even form a coating of sticky dirt that masks the true beauty of the item and makes it unpleasant to touch. Usually, regular cleaning with a home-made green cleaner would prevent the dirt from piling and forming a layer on top of the piece of furniture. Let’s admit it, though, that sometimes, we lack the energy and the time to deep clean everything in our home – thus neglect some of the most valuable items in it. Once the time for regular cleaning has passed, you should take measures to deep clean the wooden furniture. The tricky part is to manage to do it without damaging the original finish of the item. How to Deep Clean Wooden Furniture The most effective way to deep clean wooden furniture is, sadly, with chemicals. Here is what you are going to need: Linseed oil – boiled and not raw! White vinegar Turpentine A couple of cotton cloths Protective rubber gloves Something to cover the ground – cardboard or drop cloths will work just fine An old toothbrush Stick to stir the mixture Vacuum cleaner with attachments Paper towels Note: Do not use this on painted wooden furniture as the turpentine ans linseed oil will dissolve the paint! Works only for natural wood with finish. 1. Choose a well-ventilated area to place the piece of furniture. The turpentine-vinegar-linseed-oil solution releases fumes which might harm you, warn cleaning technicians from St Albans. It is a good idea to wear a face mask to protect yourself. Working outdoors is your best option. 2. Cover the working area with the drop cloth or cardboard to avoid damaging the flooring. Put on the rubber gloves for your own protection. The facial mask is optional. 3. Place the wooden piece of furniture on the covered ground. Begin the cleaning by wiping it with paper towels. Try to get as much of the dirt out as possible. Afterwards, vacuum clean its surface to remove any loose particles. 4. For the cleaning solution, mix equal parts vinegar, linseed oil and turpentine. 5. Carefully wet one of the cloths with the mixture – do not soak it as you don’t want to soak the wood with the cleaner. Start wiping the surface...
Mum Knows Best: Cleaning Tips for Grown-Ups
Does it bother you that when you reach a certain age, you realise that many of the tips and wise words of your mother turn out to be nothing but the truth, despite you rebellion against them. Yep, I’m right in the phase where I am forced to admit “Mum knows best”. Naturally, it doesn’t apply to all the aspects of my life but one thing is for sure – when you are a grown-up, mum’s cleaning tips are the best housekeeper’s guide one can ask for. Mum’s Golden Cleaning Rules 1. No window is clean until the blinds and curtains are shining and spotless as well – Cleaning the windows is an unpleasant chore, so I’m thankful that I only need to do it once a season. I know, it might not be enough according to my neat-freak (and I say that with all the love I feel) of a mother, but it still is as often as I am willing to do it. However, once I have scrubbed them clean, the last thing I want is to have more tasks on my daily To-Do list, so I used to neglect cleaning the curtains. The end result – my windows never looked as shiny and spotless as I would have liked. In the end, I was forced to face the harsh truth – mum was right wiping the glass is only half a job done when it comes to window cleaning. 2. Clean on the go – Oh, how much I have always resented that tip! Until one day, I realised I needed to give it a try. When you look at a person cleaning on the go, you might think that he/ she is rather frantic (not to say plain crazy), yet as it turns out, most of the organizing and tidying gets done without you putting any additional efforts! Even the cleaners in Forest Hill will agree with mum that cleaning as you go is the clever thing to do. 3. Make a cleaning schedule and stick to it – Planning has never been one of my best qualities, so I have always preferred to go with my gut when cleaning is due. Mould and mildew on the tiles – work in the bathroom. The microwave is smelly and stained – have to clean that next. So, my list of chores always received new additions, and my home never looked nearly as neat as my mum’s. In the end, I gave up and assembled a cleaning schedule. At first, it was on a weekly basis but over time I got the hang of it, and decided...
How to Re-Use an Old Mascara Wand
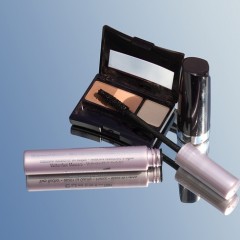
There is something no girl can go without – a high-quality mascara in her purse. While we find it perfectly acceptable to spend a certain amount of money on a reputable product or the latest, introduced on the market by our favourite brand, once the magical substance finishes, we are left with an empty package… and this happens at least once every month or so… Instead of throwing the mascara bottle and wand away, you can try some of my suggestions, inspired by A Thrifty Mrs, on how to re-use an old mascara wand. The good news is that, unless you plan on going make-up-less, you will have an endless supply of old mascara wands, and you can start collecting them for various purposes as soon as your current mascara gets empty. Phase 1. How to Re-Use an Old Mascara Wand for Cosmetic Purposes: 1. Eyebrow Brush Once you clean up the wand from the leftover mascara, you can use it to brush your eyebrows. It is an effective way to deal with the bushy eyebrow effect you gen on some mornings when you haven’t slept that peacefully. In case, the little hairs are feeling particularly naughty, and won’t succumb to brushing, you can spray some hair spray on the wand, and put an end to the eyebrow-rebellion. 2. Separate Eyelashes Surely, you have figured out this one on your own, but I can’t help but put it on my list. Old mascara wands are the best solution to dealing with eyelashes that have been “glued together” due to your generous application of mascara. It also does the trick, if you need to get rig of mascara clumps. 3. Dye Your Roots Unlike the useless brushes that come in packages with the hair dye, a mascara wand has some natural flexibility, and can help you get more coverage when sorting out your roots. With the wand, you can really get to “the bottom of the story”, and get every single root generously covered in dye. Phase 2. How to Re-Use an Old Mascara Wand for Cleaning Purposes 1. Clean Small Items Like Delicate Jewellery or Breaded Accessories Whether you need to get the dust out of your braided bag, or you want to clean the debris on a beautiful, detailed piece of jewellery. To remove dust bunnies, you can just use a clean mascara wand. Depending on the type of jewellery, like silver for instance, you might also need to apply some cleaning detergent – vinegar and baking soda paste does miracles for me. 2. Clean the Aerator of Your Kitchen Sink If you have a newer kitchen sink,...
The Closet Experiment
Sometimes, it surprises me how I manage to clutter my closet literally a few days after it has been carefully organized. The truth is that I am simply a messy person, still, being unable to fetch the blouse I have planned to wear annoys me just as much as being woken up in the middle of the night by the noisy neighbours. I have decided to behave more like an adult, and set an example to my room-mates who, just like me, are not very tidy. After having though a lot what it takes to keep my closet organized, I decided that sitting around and wondering where to begin with isn’t going to cut it even close. Since I am very curious by nature, the most sensible thing to do to keep me on track with my plans was to conduct a small experiment… and this is how it all began: 1. The Preparation If I was to keep my closet organized for a prolonged period of time, I had to start with a clean slate, right? So, I got down to business, and took everything out of the closet – just don’t ask me how much time it actually took to finish the preparation process! Since summer is about to hit us hard, the sensible thing to do was to put away my winter clothing, and accessories, and take out the summer ensemble. Having carefully folded, colour-coded, and set everything into separate piles, I decided it was time to start placing each pile on a designated spot. I worked out a scheme to make sure that I had the best access to the clothes I wear most often to work, my domestic attire, and the party stuff. Once I was done organizing, and, yes cleaning the closet, it was time to initiate the experiment… 2. Observation Time To have a successful experiment, you need to gather data on your usual behaviour for a fixed period of time, then analyse, and come up with the best ways to improve your “closet behaviour”. A week seemed like enough, based on my previous experience – usually, it takes me no longer to “ruin” my stunning arrangement… A week passed, and as it turned out, I was totally right, and the closet had reached it’s initial messy state. However, I had been a good little scientist, and I had observed, taken notes, and even some pics that I am not particularly proud of. 3. The Conclusions I lack self control! Not that big of a surprise, still, I can say that I am fairly ashamed from my behaviour. As it turned out...
I’m Not a Cleaning Expert!
Hello, My name is Samantha, or you can call me Sam, and I am here to tell you that I am not a cleaning expert! On the contrary, I can’t hate cleaning, but even more I despise living in a messy home with dust bunnies rolling around. Therefore, I started this blog where I will keep you posted on my latest, craziest home experiments on how to keep your home clean and organised with as little efforts as possible. Why is my blog called “Best Home Ideas”? It is rather simple, actually. I believe that through being lazy and looking for the smartest ways to keep clean at your home, I will be able to provide you invaluable tips and ideas… or at least I will keep you entertained while I struggle with Mission Impossible! Any way, I believe it is worth giving me a shot, or even participating with your very own stories. I would be glad to see if my advices can make a difference. Oh, and just to let you know, I am an interior designer, and I will make your visit to my personal blog worth your while with some great home décor ideas… just from time to time…...


